If you’re wondering to fix your car tint, it refers to the various methods and techniques one can employ to address issues with the tinting on their vehicle’s windows. This may include repairing peeling edges, removing air bubbles, or addressing discoloration.
Curious about how to enhance your car’s aesthetic appeal and maintain privacy? How Do I Fix My Car Window Tint? becomes a crucial question. With simple DIY solutions and easy-to-follow steps, you can quickly troubleshoot common window tint problems, ensuring a sleek appearance and optimal functionality.
It’s essential to use appropriate tools, such as a heat gun or a tint application kit. Proper cleaning and maintenance also play a key role in preserving the tint’s longevity. Familiarizing yourself with these practical tips can save you time and money, ensuring your car window tint remains in top-notch condition.
How Do I Fix My Rear Window Tint?
To fix your rear window tint, start by cleaning the glass thoroughly with a non-ammonia-based cleaner. Next, use a razor blade to carefully remove any old tint that’s peeling or bubbling. Apply heat from a hairdryer to soften the adhesive, making it easier to peel off the tint.
Once the old tint is removed, clean the glass again and cut a new tint film to the exact size of your rear window. Spray a soapy water solution on the glass, then carefully apply the new tint, smoothing out any bubbles or wrinkles with a squeegee.
Finally, trim any excess film, and allow the tint to dry completely before rolling down your window. If you’re wondering what to use on tinted car windows, following these steps can help you fix your rear window tint easily and ensure a clean and professional-looking result.
Assess the Damage
Firstly, carefully examine your rear window tint for any scratches, bubbles, or peeling edges. Identify the affected areas to determine the extent of the issue.
Gather Supplies
Next, gather the necessary supplies for the repair. You’ll need a heat gun, razor blade, soapy water, and a squeegee. Ensure the work area is clean and well-lit before proceeding.
Remove Damaged Tint
Using the heat gun, apply gentle heat to the damaged tint, making it more pliable. Peel off the tint slowly with a razor blade, keeping it close to the window. Clean any adhesive residue with soapy water and a squeegee.
Apply New Tint
Once the window is clean and dry, cut a new tint film to fit the dimensions of your rear window. Use the squeegee to apply the tint, smoothing out any bubbles as you go. Finish by trimming excess tint with the razor blade for a neat, professional look.
Final Check
Inspect the newly applied tint for any imperfections. Make sure the edges are secure and the tint lies flat against the window. With these steps, you’ve successfully fixed your rear window tint, enhancing both aesthetics and functionality.
How To Fix Air Bubbles
Fixing air bubbles in car tint is a straightforward process. Firstly, peel off the tint from the affected area. Next, thoroughly clean the glass to ensure a smooth surface. Carefully reapply the tint, smoothing it out with a credit card or squeegee to eliminate any trapped air bubbles. This simple manual approach restores a flawless and professional-looking tint job to your car windows.
To prevent future bubbles, ensure the tint is applied in a dust-free environment. Clean the glass meticulously before installation, and take your time smoothing out the tint to avoid trapping air. Following these steps guarantees a bubble-free and polished appearance for your car’s window tint.
Here’s a detailed table summarizing the steps for fixing air bubbles in car tint.
| Step | Procedure |
| 1 | Peel off the tint from the affected area. |
| 2 | Thoroughly clean the glass to ensure a smooth surface. |
| 3 | Reapply the tint carefully, smoothing it out with a credit card or squeegee. |
| 4 | Eliminate any trapped air bubbles during the reapplication process. |
| 5 | Apply the tint in a dust-free environment to prevent future bubbles. |
| 6 | Meticulously clean the glass before tint installation. |
| 7 | Take your time smoothing out the tint to avoid trapping air for a polished appearance. |
By following these detailed steps, you can effectively fix air bubbles in your car tint and ensure a professional and bubble-free result.
Causes of air bubbles
Air bubbles in car tint occur when the tint film doesn’t adhere properly to the window surface. This can happen due to dust, dirt, or inadequate cleaning before installation. To fix this issue, start by cleaning the window thoroughly with a lint-free cloth and a mixture of water and a mild detergent.
How To Fix Peeling
Fixing peeling car tint is simple. First, gather a razor blade and soapy water. Carefully lift the peeling edge with the razor and spritz the exposed adhesive with soapy water. Smooth the tint back into place, removing any air bubbles as you go. If the peeling persists, a hairdryer on low heat can aid in the process.
For a more permanent solution, apply a heat gun to reactivate the adhesive, ensuring the tint adheres firmly. If the tint is severely damaged, consider replacing it entirely. Remember, patience and precision are key in fixing peeling car tint. Follow these steps, and your car windows will be sleek and tinted once again.
Replacing Tints
Wondering if you should replace your car tint? Well, the need to fix it depends on various factors like peeling, discoloration, or damage. If your tint shows signs of wear, replacing it becomes necessary to maintain visibility and uphold safety standards on the road.
Getting precise details about the condition of your car tint is crucial. Assess if it has become ineffective due to wear and tear. Accurate information enables you to make informed decisions, ensuring your car tint is in optimal condition for both aesthetics and functionality.
Window Tint Repair
If your car window tint needs fixing, don’t worry! We can repair it for you. Our skilled technicians will carefully address any issues, ensuring your car’s tint looks brand new.
For precise details on window tint repair, contact us today. We provide expert solutions to fix and enhance your car’s tint, giving you a clear and stylish driving experience. Trust us for efficient service and a sleek finish.
Importance of prompt repairs
Prompt repairs are crucial for maintaining the longevity and efficiency of any item. When issues arise, addressing them quickly prevents further damage and potential complications. Whether it’s a leaky faucet or a malfunctioning electronic device, immediate repairs ensure that small problems don’t escalate into costly repairs.
Timely attention to issues also enhances safety, preventing accidents or hazards. Regular maintenance and swift repairs contribute to the overall reliability and functionality of equipment, extending its lifespan and saving both time and money in the long run.
DIY vs. professional repair options
When faced with repairs, considering the choice between DIY and professional options is crucial. DIY Repairs offer a cost-effective solution for those with the skills and tools. However, it’s essential to accurately assess your capabilities to avoid potential mishaps.
On the other hand, opting for Professional Repairs ensures expertise and guarantees a job well done. Professionals bring experience and specialized knowledge, saving you time and potential frustration. Carefully weigh the pros and cons, considering the complexity of the repair task and your own skill set, before deciding between the two options.
Below is a detailed table comparing DIY (Do It Yourself) and professional repair options.
| Aspect | DIY Repair | Professional Repair |
| Cost | Generally lower as you handle the repairs yourself and purchase only necessary materials. | Can be higher due to labor costs and professional service fees. However, it may save money in the long run by preventing further damage. |
| Skill Requirements | Depends on the complexity of the repair. Requires a certain level of expertise, and skills can vary. | Highly skilled professionals with specialized knowledge ensure accurate and efficient repairs. |
| Time Investment | May take longer as you need to research, gather tools, and follow instructions. | Typically faster due to the experience and efficiency of professionals. |
| Quality of Work | Depends on individual skills; quality can vary. Risk of mistakes if not done correctly. | Assured high-quality work due to the expertise and experience of professionals. Reduced risk of errors. |
| Risk and Safety | Higher risk of mistakes, potential safety hazards, and damage if not done correctly. | Lower risk as professionals follow safety protocols and have experience handling various repairs. |
| Convenience | Offers flexibility but requires personal time and effort. | Convenient as professionals handle the entire repair process, freeing up your time. |
| Warranty/Guarantee | Often dependent on individual efforts and materials used. | Typically comes with a warranty or guarantee, ensuring accountability for the quality of work. |
| Complexity of Repairs | Suitable for simple tasks; challenging repairs may require additional skills. | Capable of handling complex and intricate repairs due to professional training and experience. |
This table provides a comprehensive overview of key factors to consider when choosing between DIY and professional repair options.
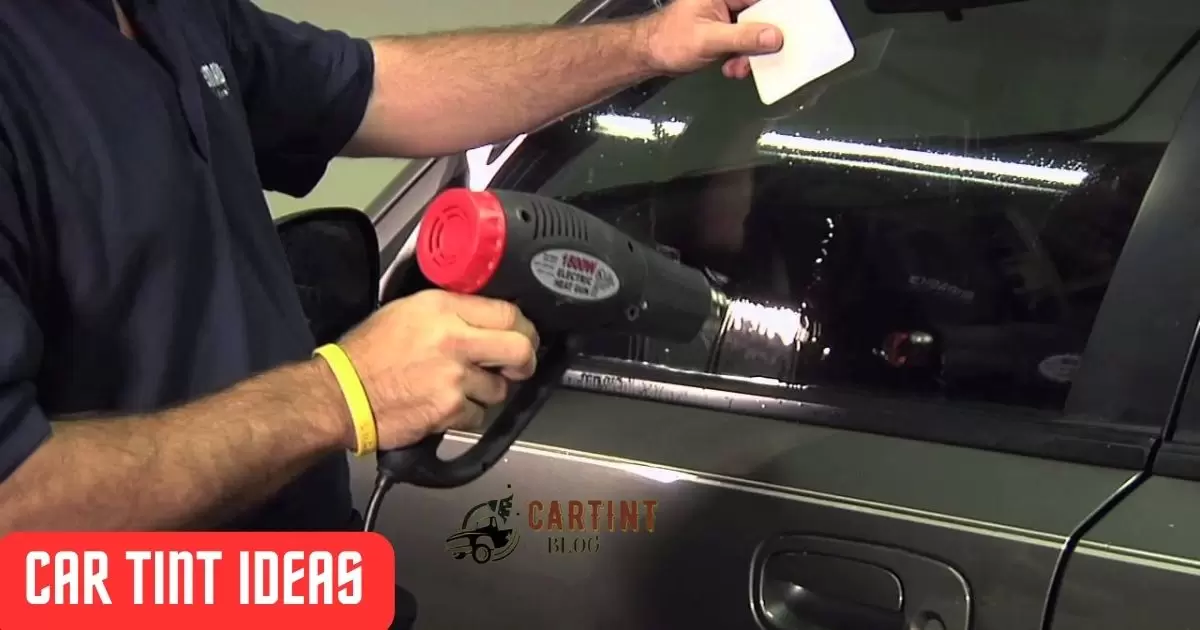
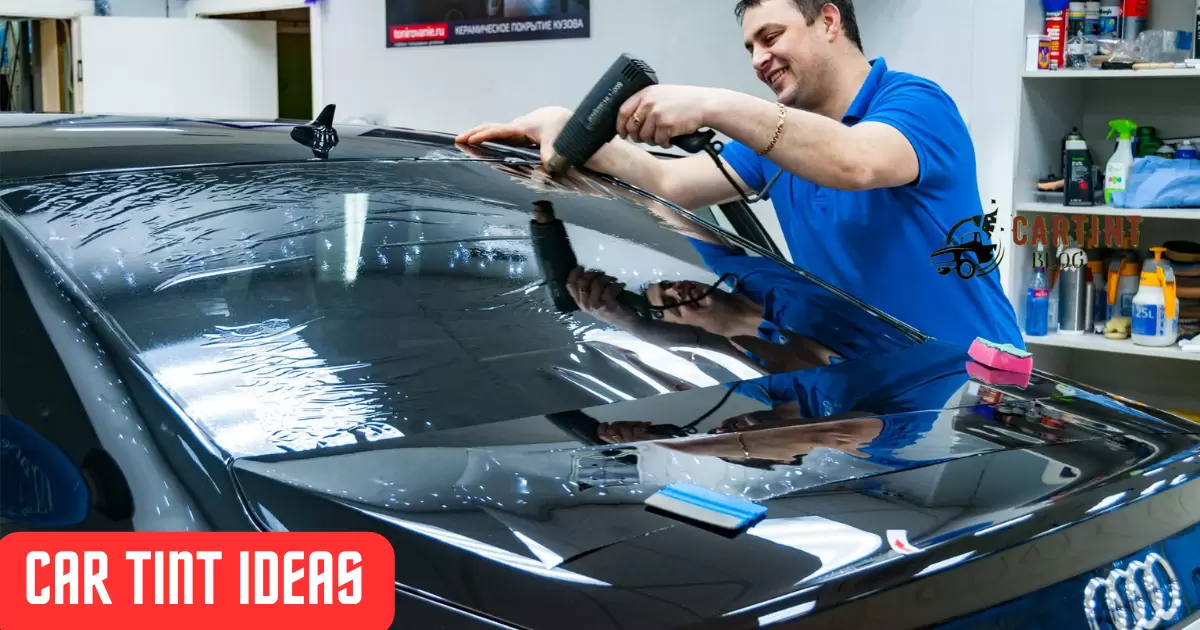
Why We Use A Heat Gun
When fixing car tint, a heat gun becomes essential. It helps adhere the tint to the windows by providing the precise amount of heat needed. The heat gun ensures a secure and seamless application, preventing bubbles or uneven tinting.
Using a heat gun in this process is straightforward. You apply the tint, and then carefully use the heat gun to heat and smooth out any imperfections. This manual touch guarantees a professional finish, making your car tint look flawless and long-lasting.
Benefits of using a heat gun for tint repair
Using a heat gun for tint repair offers quick and precise results. The focused heat softens the adhesive, making it easier to peel off old tint without damaging the glass. This method ensures efficient car tint removal, saving both time and effort.
1.Efficient Tint Removal
Quick and precise softening of adhesive.
Facilitates easy and damage-free peeling of old tint.
2.Seamless Application
Enables even adherence of new tint.
Reduces the risk of bubbles or creases for a professional finish.
3.Time and Effort Savings
Provides a fast and effective tint repair process.
Ensures a hassle-free solution for both removal and application.
Why We Use A Steamer
Using a steamer is essential when fixing car tint. It quickly and efficiently removes old tint without damaging the windows. The steamer’s hot steam softens the adhesive, making the tint easy to peel off.
When you need precise information on car tint removal, a steamer is your go-to tool. It’s a manual solution that ensures a clean and damage-free process, leaving your windows ready for a fresh tint application. Say goodbye to stubborn tint remnants with the effective and user-friendly steamer method.
How Steamers in tint repair work
Car tint repair involves using steamers to fix damaged tint. Firstly, technicians carefully assess the extent of the damage, identifying bubbles, wrinkles, or peeling. Then, they apply controlled steam to the affected areas, allowing the tint to soften.
With a manual touch, they manually smooth out imperfections, ensuring a seamless and clear finish. This method effectively restores the integrity of the car tint, leaving it looking as good as new.
How Long Until Bubbles In Tint Go Away
If you’ve just installed tint on your car windows and notice bubbles, don’t worry give it time. Typically, bubbles in tint disappear within a week or two as the adhesive settles. To speed up the process, park your car in direct sunlight, which helps the tint adhere better and eliminates bubbles faster.
In case bubbles persist after this period, a manual fix is necessary. Gently press out the bubbles with a credit card or squeegee, starting from the center and working towards the edges. Take your time to ensure a smooth finish, and your car tint should look flawless in no time.
FAQs
How do you fix tinted windows?
Gently use a credit card or squeegee to press out any bubbles, starting from the center and working towards the edges.
How do you fix a broken tint?
Repair small tears with clear nail polish or a similar adhesive, carefully applying it to the damaged area.
How do you fix bubbles in rear window tint?
Park your car in direct sunlight, as heat helps the tint adhere better and speeds up the process of eliminating bubbles.
How do you make window tint stick?
Ensure a clean surface by washing the windows thoroughly before applying the tint, and use a proper adhesive to promote better sticking.
How To Fix Damage Or Ripped Window Tint?
For more substantial damage, consider replacing the damaged section with a new piece of window tint for a seamless look.
Conclusion
In wrapping up the process of fixing car window tint, it’s crucial to remember patience is key. Whether you’re dealing with bubbles, tears, or uneven application, the solutions often lie in gentle manual adjustments. Take advantage of sunlight to aid the adhesive, using tools like a credit card or squeegee to smoothen out imperfections.
Ultimately, maintaining a clean surface during installation and addressing issues promptly ensures a successful fix. With these simple yet effective steps, you can enjoy a well-maintained and professionally-looking car window tint, giving your vehicle both style and functionality.