Removing tint from car windows involves carefully peeling off the tint film. Typically, heat is applied to loosen the adhesive, making it easier to peel away. Special tools, like scrapers, help in the removal process, but caution is needed to avoid damaging the glass. Some may opt for professional services for a smoother and more efficient tint removal experience.
Dive into the world of easy solutions and methods that answer the question, How do you get tint off car windows? Uncover the secrets to achieving clear, unobstructed views with simple techniques and tools. Say goodbye to frustrating tint issues and hello to a pristine, transparent driving experience.
Stay with us as we unravel the mystery of how to get tint off car windows. Whether you’re dealing with peeling, faded, or outdated tint, we’ve got the simple solutions you need. Discover the step-by-step process and essential tips to restore your car windows to a crystal-clear state.
Useful Tips To Remove Car Window Tint
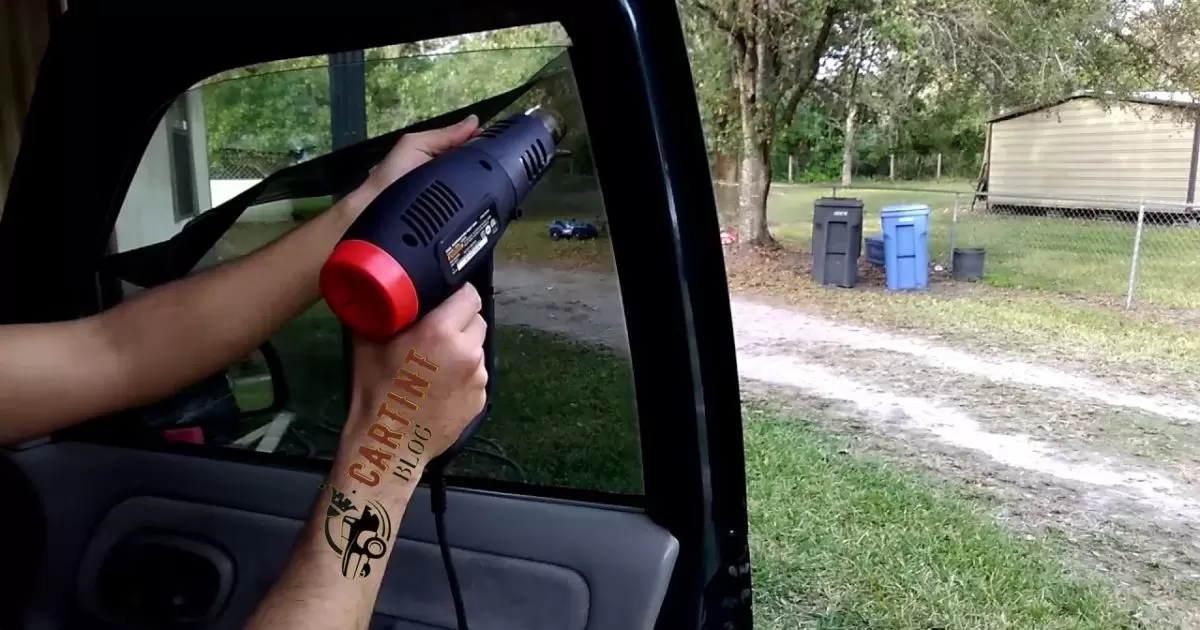
- Heat Application: Gently use a heat gun or hairdryer to warm the tint, making it easier to peel off.
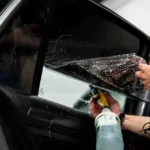
- Peeling Technique: Start at one corner and peel the tint slowly, keeping it close to the glass surface.
- Adhesive Residue: Remove any remaining adhesive with a solution of soapy water or ammonia.
- Razor Blade or Scraper: Carefully use a razor blade or scraper to lift stubborn tint or adhesive residue.
- Protective Gear: Wear gloves and safety glasses to shield yourself from potential cuts or irritation.
- Patience is Key: Take your time during the process to avoid damaging the glass or leaving adhesive behind.
- Professional Services: Consider professional tint removal for a quicker and more efficient solution.
- Legal Considerations: Be aware of local laws regarding window tint darkness and removal methods.
- Cleaning the Glass: After tint removal, clean the glass thoroughly to ensure a clear, streak-free finish.
- Avoid Abrasive Materials: Steer clear of abrasive tools that may scratch or damage the window surface.
- Dispose Responsibly: Dispose of removed tint and any materials following local regulations and environmental guidelines.
How To Remove Old Tint Off Car Windows
Reviving your car’s appearance is simple with these steps on how to remove old tint off car windows. Start by applying heat to the tint using a hairdryer or heat gun this softens the adhesive, making it easier to peel off.
Once warmed, carefully peel the tint from one corner, ensuring it stays close to the glass surface. Follow up by cleaning any remaining adhesive with a soapy water or ammonia solution. Remember, patience is key to avoid damaging the glass.
Consider professional services if you prefer a quicker solution or encounter challenges. Always prioritize safety by wearing gloves and protective eyewear during the process. With these straightforward methods, you’ll have your car windows looking clear and fresh in no time.
Use A Hairdryer Or Heat Gun
Unveiling a straightforward approach, deploying a hairdryer or heat gun proves to be a simple yet effective method for various tasks. When it comes to removing stickers, decals, or labels, directing warm air from a hairdryer softens the adhesive, allowing easy peeling without residue.
For crafting projects, using a heat gun ensures efficient moulding and shaping of materials like shrink wrap or certain plastics, giving you precision and control.In the realm of home improvement, a hairdryer becomes a handy tool to remove stubborn labels or sticky residues from glass or metal surfaces.
By applying heat, the adhesive weakens, permitting swift and residue-free removal. Whether it’s enhancing DIY projects or simplifying household tasks, the versatile hair dryer or heat gun proves to be a go-to solution for tasks that demand precision and ease.
Use Soap And Newspaper
To clean your windows effectively, grab a bucket of soapy water and a newspaper. Mix a small amount of dish soap with water, dip the newspaper in the soapy solution, and scrub the windows in circular motions. This simple yet efficient method helps remove dirt and grime, leaving your windows streak-free and sparkling.
Soap and newspaper make a budget-friendly and eco-friendly window-cleaning duo. The soap cuts through grease and dirt, while the newspaper wipes away residue without streaking. It’s a quick, hassle-free solution for achieving crystal-clear windows without the need for expensive cleaning products.
Use A Razor Blade Or Knife
For precise tint removal, grab a razor blade or knife. Hold it at a slight angle against the glass, carefully lifting the tint from one corner. Move steadily, avoiding excessive pressure to prevent scratches. This straightforward method ensures efficient removal without the need for complicated tools.
When using a razor blade or knife, exercise caution and patience. Glide the blade along the glass surface, steadily peeling off the tint. Wipe away any adhesive residue with a solution of soapy water or ammonia, leaving your car windows clear and free from unwanted tint.
Steam Cleaning
Steam cleaning is a powerful method for removing dirt and grime from various surfaces. Using hot steam, this technique efficiently breaks down and lifts away stubborn stains without the need for harsh chemicals.
It’s a versatile and eco-friendly option, suitable for cleaning everything from floors and upholstery to kitchen appliances and bathroom tiles.One key advantage of steam cleaning lies in its ability to sanitize surfaces by killing bacteria and germs.
The high temperature of the steam not only removes dirt but also provides a hygienic cleaning solution. With its simplicity and effectiveness, steam cleaning has become a popular choice for those looking to achieve a thorough and chemical-free clean in their homes and workplaces.
How To Remove Window Tint
If you want to remove window tint, start by applying heat using a hairdryer or heat gun. Warm the tint for easier peeling, beginning at a corner and gradually pulling it off. Use a razor blade or scraper to lift any stubborn residue, and clean the glass thoroughly afterward for a clear finish.
Patience is crucial during this process to avoid any damage to the window.Consider professional services for quicker and more efficient tint removal if you’re uncertain about the DIY approach.
They have the expertise to handle the task without the need for extensive tools or time on your part. Whether DIY or professional, the key is a systematic approach, ensuring your windows look clear and spotless after the tint is successfully removed.
Diy Vs Professional Installation
| Criteria | DIY Installation | Professional Installation |
| Cost | Generally Lower | Higher, with labour charges |
| Skill Level | Requires Moderate Skills | Skilled Professionals Needed |
| Time Commitment | Time-Consuming | Faster Completion |
| Tools Needed | Basic tools | Specialized Equipment |
| Quality of Work | Variable, Depends on Skills | Consistently High Quality |
| Warranty | Limited or None | Often Comes with Warranty |
| Customization | Limited | Offers More Customization |
| Risk of Damage | Higher | Lower, with Trained Experts |
| Legal Compliance | Responsibility of the DIYer | Professionals Ensure Compliance |
| Convenience | May Be Inconvenient | Convenient, Less Hassle |
This table facilitates a swift evaluation of DIY versus professional installation when it comes to window tinting. Delve into factors such as cost, skill level, time commitment, tools required, quality of work, warranty, customization, risk of damage, legal compliance, and convenience, aiding you in making an informed decision on how you remove tint glue from a car window.
Understanding Window Tint Levels
Window tint levels determine how much light enters your car, affecting visibility and privacy. Darker tint levels, like 5% or 20%, offer increased privacy but may limit visibility at night. Lighter tint levels, such as 50% or 70%, maintain better visibility but provide less privacy.
It’s crucial to comprehend these levels to choose the right tint for your preferences and local regulations.To understand window tint levels, first, check your state’s regulations to ensure compliance.
Different tint levels may impact your driving experience, so consider factors like climate, safety, and personal preference when making your choice. By grasping the significance of window tint levels, you can strike a balance between style, functionality, and adherence to the law.
Steps Involved In Removing Window Tint From Cars
To remove window tint from cars, start by using a heat gun or hairdryer to warm the tint. Peel it slowly from one corner, ensuring it stays close to the glass. If adhesive residue remains, use a soapy water or ammonia solution to clean it off, and consider employing a razor blade or scraper for stubborn spots.
If opting for a DIY approach, follow local laws regarding tint darkness, wear protective gear, and dispose of removed tint responsibly. Clean the glass thoroughly after removal to achieve a clear, unobstructed view. With these simple steps, you can successfully rid your car windows of unwanted tint.
Understanding Tint Removal Basics For Cars
When it comes to removing tint from car windows, start by gently warming the tint with a heat gun or hair dryer. Peel it off slowly from one corner, keeping it close to the glass. Don gloves and safety glasses to protect yourself, and use a razor blade or scraper for any stubborn residue.
Take your time and clean the glass thoroughly after removal for a clear finish.Consider professional tint removal services for a quicker solution, especially if you’re unfamiliar with the process.
These experts ensure a smooth removal without damaging the glass. Remember, legal considerations about tint darkness and removal methods may vary, so be aware of local regulations. With these basic tips, you can efficiently and safely remove tint from your car windows.
Assessing The Condition Of Window Tint
When evaluating your window tint, start by visually inspecting for signs of peeling, discoloration, or bubbles. Examine the edges to check for any lifting or separation from the glass. If the tint appears compromised, proceed to gently touch and feel for any irregularities or rough spots.
A thorough assessment ensures you identify areas that may need special attention during the removal process.Consider the age of the tint, as older films may become brittle and more challenging to remove.
If you notice any deterioration or if the tint seems fused to the glass, it might be an indicator that a careful and patient removal approach, possibly with the aid of heat, will be necessary. Regularly assessing your window tint helps you stay proactive in maintaining a clear and functional window appearance for your vehicle.
Choosing The Right Tint Removal Method
When deciding how to remove window tint, start by considering the appropriate method. Applying heat is a common and effective technique – use a heat gun or hairdryer to warm the tint, making it easier to peel off. Another option is a razor blade or scraper, but be cautious to prevent damage to the glass.
Take your time, weigh the options, and opt for the method that best suits your preferences and the condition of your car’s window tint.Professional tint removal services are also available for those seeking a hassle-free solution.
Experts can efficiently and safely remove the tint, ensuring a clear and unobstructed view without the need for DIY efforts. Whether you choose the DIY approach or professional help, selecting the right tint removal method is crucial for achieving the desired results and maintaining the integrity of your car’s windows.
Gather Necessary Tools And Materials
To remove car window tint effectively, gather the necessary tools and materials beforehand. Grab a heat gun or hair dryer to apply gentle heat, making the tint more pliable for removal. Arm yourself with a razor blade or scraper, gloves, and safety glasses for a safe and efficient tint removal process.
Ensure you have a soapy water or ammonia solution on hand to address any lingering adhesive residue. Having these tools readily available ensures a smoother experience, helping you peel away the tint and leave your car windows clean and clear.
Safety Precautions During Tint Removal
When removing tint from car windows, prioritize safety by wearing protective gear such as gloves and safety glasses. These precautions shield against potential cuts from sharp tools and protect the eyes from any debris. Ensure proper ventilation in the workspace to minimize exposure to fumes if using chemicals for adhesive removal.
To avoid accidents, work in a well-lit area and keep tools organized. Handling heated tools, like a heat gun, requires extra caution; maintain awareness of surroundings to prevent burns or damage. Following these safety measures guarantees a secure tint removal process for both you and your vehicle.
Peeling Tint: Step-By-Step Guide
Removing tint from car windows is a straightforward process that you can easily tackle with a step-by-step approach. Begin by warming the tint with a heat gun or hair dryer, making it pliable. Then, carefully peel off the tint from one corner, keeping it close to the glass to minimize residue.
Use a razor blade or scraper if needed, ensuring a smooth and clean removal. To take your time and exercise patience throughout the peeling process to avoid any potential damage to the glass.After successfully peeling off the tint, address any remaining adhesive residue by using a solution of soapy water or ammonia.
Gently rub the residue, ensuring thorough removal. Wearing gloves and safety glasses is advisable for protection. This simple, DIY approach allows you to reclaim clear windows without the need for professional help, saving both time and money.
Utilizing Heat For Efficient Tint Removal
When removing window tint efficiently, apply heat to the tinted surface using a heat gun or hair dryer. The heat softens the adhesive, making it simpler to peel off the tint. Begin at one corner, gradually peeling the tint away while keeping it close to the glass surface.
This method ensures a smoother removal process and minimizes the risk of damaging the window.Exercising patience during this task is crucial. Take your time to avoid leaving adhesive residue or causing scratches on the glass.
Utilizing heat for efficient tint removal is a straightforward and effective DIY approach, providing a clear and unobstructed view through your car windows.
Adhesive Residue: Cleaning After Tint Removal
After removing the window tint, you’ll likely encounter adhesive residue on the glass. To clean it effectively, use a solution of soapy water or ammonia. Apply the mixture with a cloth or sponge, scrubbing gently to ensure a residue-free and clear window surface.
It’s essential to tackle the adhesive promptly, preventing any lingering stickiness or cloudiness. Regular cleaning with the right solution will leave your windows spotless and ready for a clear view of the road.
How To Remove Window Tint Without Heat
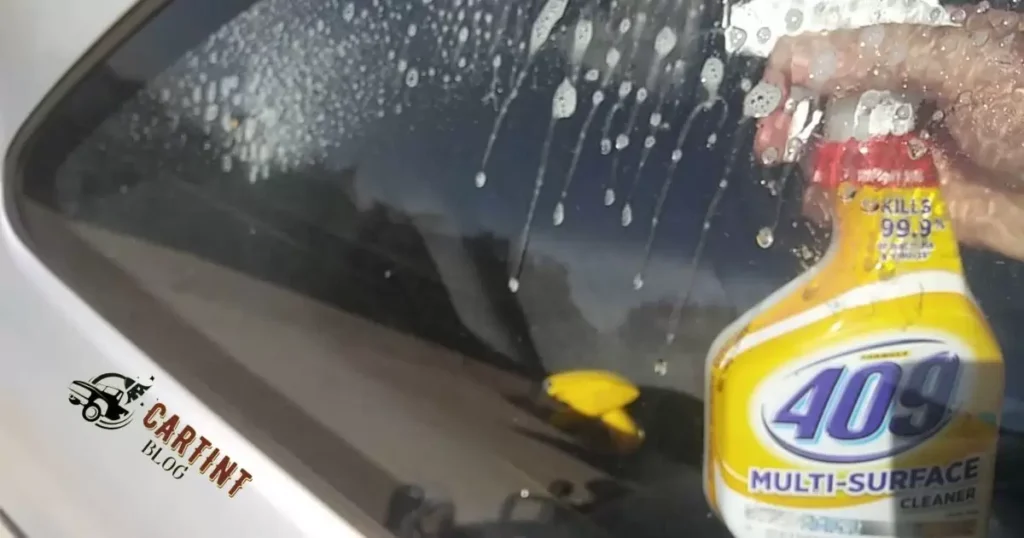
If you’re wondering how to remove window tint without heat, there are alternative methods that don’t involve warming the tint. One effective approach is to use a soapy water solution, spraying it generously on the tinted surface.
Allow the solution to soak for a while, making the tint more pliable, and then carefully peel it away, ensuring a clean and residue-free removal.Another method involves utilizing a razor blade or scraper to lift the tint from the corner, working slowly to avoid damaging the glass.
Always exercise caution to prevent scratches, and follow up with a glass cleaner for a clear, transparent finish. These heat-free techniques offer practical solutions for those seeking to remove window tint with minimal effort and without the need for additional tools.
How To Remove Tint From Car Windows At Home
Removing tint from car windows at home is a straightforward process. Begin by using a heat gun or hairdryer to warm the tint, making it easier to peel off. Once the tint is warmed, carefully peel it away starting from one corner, ensuring a smooth and steady removal without damaging the glass.
After peeling off the tint, tackle any leftover adhesive using a mixture of soapy water or ammonia. Utilize a razor blade or scraper to lift stubborn residue. Wear gloves and safety glasses for protection, take your time, and enjoy clear, unobstructed windows without the need for professional help.
Window Tint Removal Spray
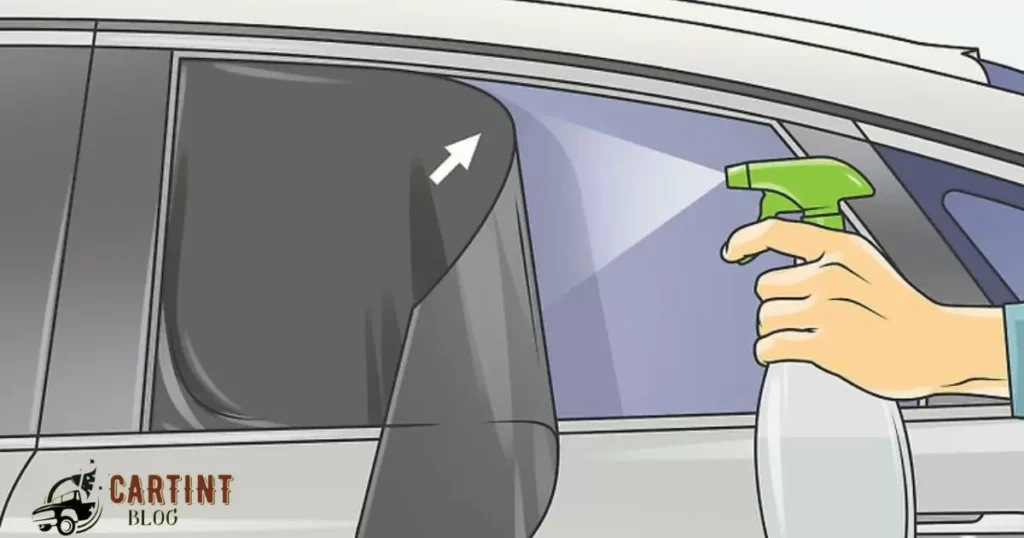
Upgrade your window tint removal game with the Window Tint Removal Spray. This effective solution simplifies the process by softening the adhesive, allowing for easy and swift removal. Simply apply the spray, wait for a few minutes, and effortlessly peel away the tint, leaving your windows residue-free.
No need for complicated tools or professional services; the Window Tint Removal Spray is your DIY solution. Enjoy the satisfaction of clear, unobstructed windows with this user-friendly and efficient spray. Say goodbye to stubborn tint and hello to a hassle-free removal experience!
Removing Window Tint Glue
When tackling the task of removing window tint glue, begin by applying heat to the adhesive using a hairdryer or heat gun. Gently peel off the tint, focusing on one corner at a time, and discard it. To address any lingering glue, employ a mixture of soapy water or ammonia, scrubbing with a soft cloth for a clean, residue-free finish.
Remember to exercise caution and wear protective gear during the process. Avoid using abrasive materials to prevent damage to the glass, and dispose of the removed tint and cleaning materials responsibly in accordance with local regulations.
How Long Does It Take To Remove Window Tint
Removing window tint usually takes a couple of hours, depending on the method used. If you’re using a heat gun, the process may be quicker, taking around 1 to 2 hours. On the other hand, if you’re opting for a more gradual method, such as ammonia and newspaper, it might take a bit longer, possibly 2 to 4 hours.
The key is to be patient and work carefully to avoid any damage to the glass.Professional services can expedite the process, typically completing it in about 1 to 2 hours. Their experience and specialized tools make for a more efficient tint removal.
Whether you choose the DIY route or seek professional help, the time it takes to remove window tint ultimately depends on the method and your approach to the task.
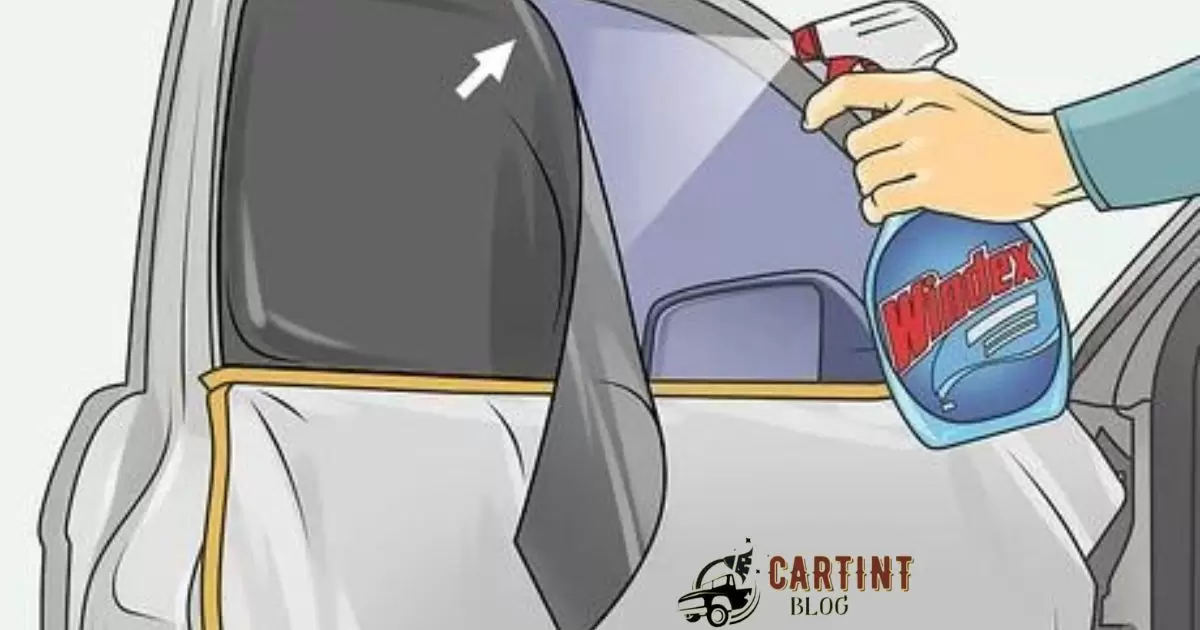
How To Remove Window Tint With Windex
Revitalizing your car’s appearance is a breeze with the straightforward method of using Windex to remove window tint. Begin by generously spraying Windex on the tinted surface, ensuring even coverage. Then, patiently peel off the tint, taking advantage of Windex’s effectiveness in loosening adhesive.
This simple and cost-effective technique offers a hassle-free solution to enhance visibility and give your windows a clean, transparent look.Say goodbye to stubborn tint remnants with this DIY approach. After peeling off the tint, use a clean cloth soaked in Windex to wipe away any remaining adhesive residue.
This quick and efficient process not only restores your car windows to clarity but also eliminates the need for expensive professional services. Get ready to enjoy the benefits of clear, untinted windows without the fuss!
Window Tint Removal Kit
Upgrade your car effortlessly with a Window Tint Removal Kit. This handy toolset simplifies the process, allowing you to peel off old, damaged tint with ease. Simply follow the step-by-step instructions, using the provided tools, and enjoy clear, unobstructed views from your vehicle’s windows.
With the Window Tint Removal Kit, say goodbye to the hassle of stubborn tint and adhesive residue. This user-friendly kit ensures a quick and efficient removal process, providing you with a smooth and transparent finish. Take control of your car’s appearance by investing in this practical solution for a hassle-free window tint makeover.
FAQ’s
What is the easiest way to remove window tint from a car?
The easiest way is to use heat. Apply a hair dryer or heat gun to loosen the adhesive, making it simple to peel off.
What chemical removes tint from car windows?
Ammonia-based solutions are effective. Mix soapy water with ammonia, apply, and peel the tint away after it softens.
How do you remove tint adhesive from a car?
Scrape it off with a razor blade or use adhesive remover. Apply, let it sit, and wipe away the residue for a clean surface.
Can tint be removed from the windshield?
Yes, tint can be removed from the windshield. Use heat and a razor blade, then clean the glass thoroughly for a clear view.
Conclusion
In conclusion, mastering the art of How Do You Get Tint Off Car Windows? unveils a world of possibilities for a clearer and more aesthetic driving experience. Armed with the right tools and techniques, the process becomes a manageable task, ensuring your vehicle’s windows are free from unsightly tint remnants.
As you navigate through the steps outlined in this quest, you’ll discover the answer to How Do You Get Tint Off Car Windows? not only transforms your vehicle’s appearance but also guarantees unobstructed views and a renewed sense of clarity on the road.